Thursday, June 28, 2012

QUILTING CLASS COMMUNITY

I signed up for the Checks and Balances Quilt As You Go class at City Quilter this summer because I do love quilt as you go (it helps improve the odds that I'll actually finish what I start!) and Judy Doenias is one of my favorite teachers (she's also one of the teachers for City Quilter's ongoing Dear Jane class). It was a three-session class that ended last night, and although Judy and one of my quilting pals convinced me to do an entirely different pattern (Tipsy Strips, a variation on Drunkard's Path - see one of Judy's samples here), I paid enough attention to the Checks and Balances pattern to give it a try some time.  

I decided to make the quilt as a gift, so once again, I can't post any of my progress yet. But, I'd like to say a bit about the class experience. 

Historically, quilting has always been a community activity as well as a solo endeavor. A quilter might piece together a top alone, but would likely call upon friends and community members to help with the quilting. One of the things I like most about the quilting classes I take is the input and feedback from others in the class. Someone might ask a question that I hadn't thought of, or someone might offer an alternative method for cutting or assembling. And of course, there's the invaluable advice on which color to use for the border, or which of two green batiks best compliments a quilt without overwhelming it. Whether or not the advice is taken, I've found that quilters are happy to offer their thoughts and respect whatever choice is made.

In short, I really appreciate the community of the quilting class. Last night was a perfect example. One of the fabrics I chose for the back of my quilt is considerably brighter than the other fabrics. I'd originally made four blocks with each of the six backing fabrics (three each of two different colors) so that I could get an idea of how they would work together. When I laid out the blocks with like fabrics together, I found that the brighter fabric stood out, but not in a good way. After a lot of thought, I'd decided not to make any more blocks with that fabric and to find a fabric that blended better with the others. I like the fabric, so I was a little disappointed, but I knew I'd find a use for it some time down the road. Last night, I put all my blocks up on the design wall in the class room and started bringing in other fabrics to see what I could use in its place. Judy and the other students were very helpful in offering their thoughts on whether or not something worked.

I hadn't been able to find anything I liked and was feeling a little discouraged, when Judy said she really did like the bright fabric, and a few others agreed. I like it too, but it's just so much brighter than the other fabrics that it drew my eye right to it. Then I got an idea. What if I mixed the like colors together, instead of making a path with just one fabric at a time? I rearranged the blocks on the wall...and it worked. Everyone agreed that mixing the colors made the best arrangement. 

Done! No need to sideline the bright fabric. No need to buy new fabric. Time and money saved! Without the input from the others at the class (not to mention the spacious design wall), I likely would not have found the right combination and layout.

And that's not to say that the sole focus of the class was my layout. There was teaching, and sharing samples, and we also gave our input to another class member who was looking for just the right combination of batiks for her quilt. Very understated colors, but with a little pop of turquoise. How much more turquoise should she use? What would be too much? Everyone chipped in, but no one seemed offended if their suggestion wasn't chosen. 

People may wonder why I take so many classes and spend so much time shopping at quilt stores. Sure, I enjoy learning new techniques and patterns, but I think much of it has to do with the sense of community I feel. Where else will a perfect stranger ask you to help them make a decision on their purchase? I get very strange looks when I ask someone at a department store if something I've tried on looks good, but I've had numerous people ask my advice, or offer advice, on fabric combinations. 

And so I offer my thanks to teachers, classmates (I'll miss everyone from the Checks and Balances class and hope to see your finished quilts someday), store employees, and random shoppers for providing me with such a welcoming and supportive community. You all contribute to keeping me addicted to quilting!

Monday, June 18, 2012

BERNINA UPGRADE

In 1989, my mother offered to buy me a sewing machine, as she had done for my older sisters. We went to the sewing machine dealer and she gave me two options: 1) I could have a new Brand X machine (I honestly don't remember the brand) or 2) I could have a 1969 Bernina model 731.  The 731 was very similar to the model 530 my mom has had since she got married; the machine on which she taught me to sew. I don't remember pausing at all before telling her I wanted the Bernina. She paid $275 for it, which was a hefty sum for her back then, but it seems like a bargain to me now.


I've sewed on that machine ever since. I've used it to make skirts and dresses, curtains and pillows, quilts and quilt tops, and even a few improvised chair covers. It's a great machine, built like a tank and still going strong. But, it doesn't do many stitches and I'd starting getting a little envious of my friends' newer and more amply equipped machines. The question was, would I buy a different brand that might get me more features for less money, or would I spring for a newer Bernina that would probably cost more, but would likely last forever, just like my old machine? A dilemma.

So, when I heard that The City Quilter was upgrading its classroom machines to new 550QE models, and they'd be selling the old 440QEs, it got me thinking. They were having the machines completely refurbished and they would come with a new-machine warranty. Still, a Bernina is rarely cheap, and I while I considered the price fair, it was still a hefty sum.

After discussions with my husband (who is surprisingly supportive of my quilting habit) and my sister (who is always surprisingly wise for one so youthful), I decided that getting one of the used machines would be a good investment. Given how much I've been sewing in the past few years, I can only presume that the new machine will make that sewing easier and more enjoyable.

I stopped by the shop one day to pick up some thread and mentioned that I'd decided that I wanted one of the machines.  About a week earlier, they'd told me that the machines were out being serviced, so I was taken by surprise when they said they had one ready to send home with me.

Huh?!

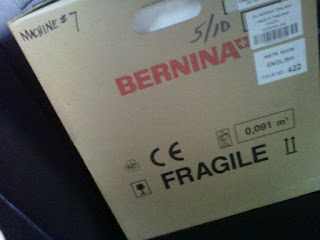
Sure, I'd decided that I was going to get one, but hadn't planned on getting one that day. But, no sense in procrastinating, so I bought the machine, hailed a cab, and headed home. My husband was out of town, so I photographed the friend in the cab and texted it to him.

He was not entirely surprised.

So, my new machine is home now and I'm not disappointed. It's a little quieter than the 731, which means I can better hear my NPR shows as I sew, and I appreciate the highly specific stitch length options...not to mention the many stitches available!


Included in the purchase price was a three-hour "get to know your machine" guide class. Among other things, we learned how to use the needle threader (I'm still doing it the old-fashioned way), the walking foot, the Bernina Stitch Regulator, and (perhaps my favorite) the programmable memory.

I still need some practice with my free motion quilting...


...and I have to figure out a way to get the apostrophe to show up better...


...but I did make my first ever buttonholes. (I've always either opted for a zipper or had my mom make buttonholes for me.)

I also have to get used to the knee-operated free hand system for lifting the presser foot. I'm told it saves a lot of time. My problem is that the "gas pedal" for my mom's old Bernina is a knee control lever, instead of a foot control. (See item 19 below.)

Even though I haven't used her machine for many years, my muscle memory wants to use anything by my knee to control the speed of my sewing. It's going to take a while to retrain myself.

I have plenty to learn about all the ins and outs of the machine, but I'm very pleased with my purchase and look forward to years of happy quilting together.

Sunday, June 10, 2012

LETTING GO...AND HOPING FOR THE BEST

So, I finished the lap quilt I was making for our friend who was moving to Pasadena and have been waiting to give it to her before posting the final product (read more about the quilt here and here). I'm really happy with the way the colors work together in a relatively simple pattern (Lake Shore Drive from Colorful Quilts for Fabric Lovers by Amy Walsh and Janine Burke). And the purple Kaffe Fassett Wood Ear on the back may be my new favorite fabric. It's so vibrant and friendly. Love it!

Betty's Purple Passion
Back of quilt
We took Betty out to dinner a few days before she left and gave her the quilt that night so she'd have time to include it in her packing. She's not one for grand displays of emotion, but my husband (who knows her far better than I do) said he could tell she likes it.

Betty has now made the move west and is settling into her new apartment. We hear that she's using the quilt to add color to her bedroom and carries it with her from room to room to help stay warm in the air conditioned environment. (She's not used to central air at home.)

My goal was to give Betty something that would remind her of her New York friends, and to help make her new home more comfortable. The quilt seems to have succeeded on both counts. I couldn't be more pleased.

Monday, June 4, 2012

OM IS WHERE THE QUILT IS

At the April Metro Mod Quilting Guild meeting, we were reminded that the deadline for the Alliance for American Quilts "Home Is Where the Quilt Is" contest was June 1. I liked the idea of making a very small quilt (15" wide x 19" high) in the shape of a house and thought I'd give it a try. My first time entering a quilting contest!


Because we had so many quilts around when I was growing up, quilts have always felt like home to me--comforting and calming. A quilt is always a safe place to cozy up. I kept trying to think of a way to reflect that in a quilt, but kept coming up blank. Then, after a particularly trying day at work, I came home looking forward to doing some quilting to calm and distract me from the frustration at the office. Before starting, I took a few deep, cleansing breaths...and then it occurred to me: quilting calms me just like yoga does.  And that's when it hit me, "Om Is Where the Quilt Is." 

A sacred Sanskrit word, "om" is used at the beginning and end of a prayer or mantra, and is often intoned at the start and end of yoga classes. To me, it's an invitation at the beginning of class to refocus and calm myself, and a reminder at the end of class to take that focus with me.

I'd been working on a few log cabin blocks, so I decided to to put together a wonky log cabin house in various shades of blues (a calming color for me) with an om symbol in a shade reminiscent of henna.

I started the quilt in late April and was pleased with how quickly the base of the house (the rectangle) came together. The roof, my first log cabin triangle, was also pretty easy.

House base with roof positioned for sewing.
I'm not a big fan of applique, so I knew attaching the om symbol was going to be a challenge. I decided to use zigzag topstitching to save my sanity. Unfortunately, I'd never even done that before.  So instead of looking online for a tutorial or some tips, I presumed I could find my way. I went ahead and cut out the om and basted it to the quilt top. Then I started topstitching. As you can see below, it turned out horribly, with puckers aplenty. This was not a good plan.

How NOT to machine applique.

Discouraged, I put the quilt aside for a few weeks while I tried to figure out how to fix it (and to put off undoing all that topstitching!). I think I was reading a quilting magazine that mentioned fusible web and thought that might solve my problem. I also thought it might help with stability to quilt the house before attaching the om. So, I focused on quilting the house (I used straight and curvy lines radiating from the center), then I bought some fusible web (for lightweight fabrics), removed the old om, and cut out a new one.


Then, following the instructions on the package, I attached the fusible web to the om (so simple--just lay the fabric on the web and apply pressure), and trimmed the web to the size of the fabric.


I pulled the paper off the web...


...positioned it on the house, and pressed using a hot iron. That om wasn't going anywhere!

What a breeze it was to do the topstitching this time. No fighting fabric, and the results were exactly what I had in mind.

I broke out my trusty copy of Happy Endings by Mimi Dietrich (I find I always have to consult the binding bible when I get to that point) and made and attached the binding. I'm pleased with how it turned out, although this photo (taken as I was rushing to get it in the mail before the deadline) is not fabulous. Hopefully it will look better at the exhibit!
The houses will be part of a traveling exhibit through November, starting at the Original Sewing & Quilt Expo in Raleigh, North Carolina, then they'll be auctioned off to benefit the Alliance for American Quilts.
Here are a few other bloggers who have posted about their entries: