Saturday, December 29, 2012

THE CAT IS OUT OF THE BAG

Shortly after I apparently fell into a giant black hole in July, the event I'd been waiting for finally arrived in mid-August. My niece and new nephew-in-law got married in a beautiful ceremony at a winery in Northern California. (Congrats from your Aunt Consuela, kids.) That means I can now reveal the (as yet unfinished) quilt I was working on all summer. (Read more about the quilt design here.)


Their wedding colors were red and yellow (roses and sunflowers), so I opted to go with black and white fabrics for the front, as well as a few fabrics with dashes of red or yellow, or in some cases, both red and yellow. 


For the back, I selected a total of six floral fabrics (sunflower-esque), three in red with black and white, and three in yellow with black and white. (I must say, it's easier to find red fabrics than yellow these days.)


I also found two cute fabrics (one red and one yellow) to use for the sashing on each block.  I chose to go with solid black for the sashing between blocks, because I really didn't need any more pattern going on with all the prints in the blocks. (Thanks to my City Quilter classmates for assisting with sashing fabric selection.)
As anticipated, I did not finish the quilt in time for the wedding (in fact, I'm still working on it), so I took two of the extra back squares and assembled two blocks as pot holders (also known as hot pads in my family). I'd never made them before, but I bought some Insul-Bright and found it surprisingly easy to work with. I did have to pin the blocks together while I was sewing the strips, because the batting and Insul-Bright together moved around quite a bit more than just the batting on its own.


I brought the finished portion of the quilt to the wedding to show the happy couple (no, not at the ceremony; at the brunch the next day). It was only 1/5 the length it will be when it's done, but I was pleased with how it looked and it gave them a good idea of what the pattern will be. The happy couple was pleased with what they saw, and they're unexpectedly happy to have hot pads that match their bedroom decor.


I have to admit that I've taken to working on it more sporadically, since I find my eyes need a break from black and white and red an yellow. I will finish it before their first anniversary, of that I'm sure.

Thursday, July 26, 2012

QUILT PROGRESS UPDATE

So, I've been busy lately (who hasn't been?), and haven't been making as much progress on the mystery gift quilt as I'd like. That said, here are the current counts:

Back squares cut (of 90) - 96 (I'll find a use for the extras) 
Batting squares cut (of 90) - 88
______________________
Blocks pieced (of 90) - 45 
Blocks assembled (of 90) - 45
Blocks finished with sashing (of 90) - 41 
______________________ 
Rows of blocks assembled (of 10) - 1 
Rows of blocks finished (of 10) - 0 
______________________ 
Rows attached together (of 10) - 0 
Rows attached & finished (of 10) - 0 
______________________ 
Binding attached - 0 
Binding finished - 0

More hand sewing of the sashing on row 1 is on tap for the bi-weekly "quilt night" at my friend's apartment tonight. A group of quilters worked on a project together last year and enjoyed each other's company so much that a handful of us (whoever is available) get together every two weeks or so to work on whatever hand work we have to do -- quilting, embroidery, or whatever. We bring cheese, crackers, cookies, wine, or whatever strikes our fancy to share. There are always intriguing projects to see and our conversations run the gamut from challenges with kids and family, to travel tips, current events, recipes, and even quilt topics. Yet another instance of a nurturing quilting community. I love me some quilt night!

Thursday, July 12, 2012

A POST ABOUT SOMETHING I CAN'T DISCUSS

I have once again been an irresponsible blogger. I am working on a quilt that is a gift, and am therefore unable to post any photos or too much information about it without risking the giftee seeing it. That means I haven't been able to blog about what's been taking up my time over the past few weeks.

So, I've decided to try a new tactic and talk about what I have to accomplish in the broadest possible terms, so that I can post my progress and hopefully feel some accountability to those of you who may be following.

The quilt I'm making is quilt-as-you-go, because I like seeing the quick progress on QAYG projects, and I have a history of actually finishing them, as opposed to the finished quilt tops languishing in my sewing room waiting to be paired with back and batting.

It's going to be a fairly large quilt, so I have to make a total 90 blocks--ten rows of nine blocks across. Each block is constructed of a random number of fabric strips sewed directly onto the back and batting. It's basically foundation piecing, not unlike what's described here, except that instead of just the square of fabric, you also have the square of batting. On this quilt, I've been starting from the middle (the longest strip from corner to corner), but it works starting from the corners as well. When I start from the corners, I sometimes forget to take into account that the next piece will need to be long enough not just to attach to the previous piece, but also long enough to span the width of the foundation.  Starting with the long strip in the middle, everything is shorter and I find I don't have as many errors in length.

I'm using strips varying in width from 1-1/4" to 2" to give the block some variety, and I'm using a number of different fabrics, all in the same color family.  When I'm done, a block looks something like this:
Of course, it also has colors and pattern from the fabrics, which I can't show here (sigh).

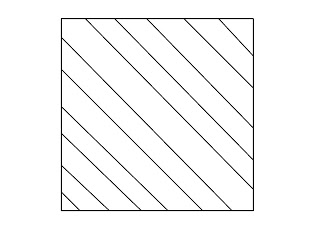
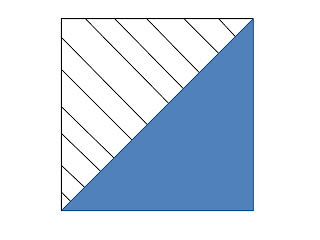
After the block is finished, I make a cut and flip part of the block so that the back of that part is now on the front, and the front of that part is now on the back. I can't show the cut I'm really making, of course, so let's pretend it's from corner to corner.
To reattach the two parts of the block, I cut sashing for both the front and back, and use my machine to attach it to both front and back of one of the block parts. Then, I sew the two parts of the block back together using a zigzag stitch. On previous quilts, I've hand stitched the other half of the sashing, but because this quilt will have so many blocks and so much sashing, a friend recommended that I use a decorative stitch on my fancy new Bernina to attach the other half of the sashing. After a bit of trauma with the bobbin thread breaking on me mid-sashing, I found a thread tension that works for the decorative stitch I like and it's saved me a lot of time. With the sashing, it looks something like this.

The block is now complete and ready to be attached to other blocks to make rows.  I use the same technique to assemble the blocks into rows. I cut sashing and assemble it to both sides of one block, then attach the two blocks using a zigzag. I'll use this technique to sew the rows to each other as well. I've decided to hand stitch the sashing between the blocks and the rows, so that's my hand stitching project for the summer! (Isn't it great to have a quilt draped across your lap in the hot, hot weather of July and August?)

So, I'm hoping that I haven't given too much away, should the giftee happen across this post, and I also hope that what I've shared isn't so vague that it's incomprehensible to someone who isn't familiar with this technique. In any case, here's the list of everything I need to complete on this quilt and my progress so far:

Back squares cut (of 90) - 96 (I'll find a use for the extras)
Batting squares cut (of 90) - 62
______________________
Blocks pieced (of 90) - 33
Blocks assembled (of 90) - 31
Blocks finished with sashing (of 90) - 29
______________________
Rows of blocks assembled (of 10) - 1
Rows of blocks finished (of 10) - 0
______________________
Rows attached together (of 10) - 0
Rows attached & finished (of 10) - 0
______________________
Binding attached - 0
Binding finished - 0

Thursday, June 28, 2012

QUILTING CLASS COMMUNITY

I signed up for the Checks and Balances Quilt As You Go class at City Quilter this summer because I do love quilt as you go (it helps improve the odds that I'll actually finish what I start!) and Judy Doenias is one of my favorite teachers (she's also one of the teachers for City Quilter's ongoing Dear Jane class). It was a three-session class that ended last night, and although Judy and one of my quilting pals convinced me to do an entirely different pattern (Tipsy Strips, a variation on Drunkard's Path - see one of Judy's samples here), I paid enough attention to the Checks and Balances pattern to give it a try some time.  

I decided to make the quilt as a gift, so once again, I can't post any of my progress yet. But, I'd like to say a bit about the class experience. 

Historically, quilting has always been a community activity as well as a solo endeavor. A quilter might piece together a top alone, but would likely call upon friends and community members to help with the quilting. One of the things I like most about the quilting classes I take is the input and feedback from others in the class. Someone might ask a question that I hadn't thought of, or someone might offer an alternative method for cutting or assembling. And of course, there's the invaluable advice on which color to use for the border, or which of two green batiks best compliments a quilt without overwhelming it. Whether or not the advice is taken, I've found that quilters are happy to offer their thoughts and respect whatever choice is made.

In short, I really appreciate the community of the quilting class. Last night was a perfect example. One of the fabrics I chose for the back of my quilt is considerably brighter than the other fabrics. I'd originally made four blocks with each of the six backing fabrics (three each of two different colors) so that I could get an idea of how they would work together. When I laid out the blocks with like fabrics together, I found that the brighter fabric stood out, but not in a good way. After a lot of thought, I'd decided not to make any more blocks with that fabric and to find a fabric that blended better with the others. I like the fabric, so I was a little disappointed, but I knew I'd find a use for it some time down the road. Last night, I put all my blocks up on the design wall in the class room and started bringing in other fabrics to see what I could use in its place. Judy and the other students were very helpful in offering their thoughts on whether or not something worked.

I hadn't been able to find anything I liked and was feeling a little discouraged, when Judy said she really did like the bright fabric, and a few others agreed. I like it too, but it's just so much brighter than the other fabrics that it drew my eye right to it. Then I got an idea. What if I mixed the like colors together, instead of making a path with just one fabric at a time? I rearranged the blocks on the wall...and it worked. Everyone agreed that mixing the colors made the best arrangement. 

Done! No need to sideline the bright fabric. No need to buy new fabric. Time and money saved! Without the input from the others at the class (not to mention the spacious design wall), I likely would not have found the right combination and layout.

And that's not to say that the sole focus of the class was my layout. There was teaching, and sharing samples, and we also gave our input to another class member who was looking for just the right combination of batiks for her quilt. Very understated colors, but with a little pop of turquoise. How much more turquoise should she use? What would be too much? Everyone chipped in, but no one seemed offended if their suggestion wasn't chosen. 

People may wonder why I take so many classes and spend so much time shopping at quilt stores. Sure, I enjoy learning new techniques and patterns, but I think much of it has to do with the sense of community I feel. Where else will a perfect stranger ask you to help them make a decision on their purchase? I get very strange looks when I ask someone at a department store if something I've tried on looks good, but I've had numerous people ask my advice, or offer advice, on fabric combinations. 

And so I offer my thanks to teachers, classmates (I'll miss everyone from the Checks and Balances class and hope to see your finished quilts someday), store employees, and random shoppers for providing me with such a welcoming and supportive community. You all contribute to keeping me addicted to quilting!

Monday, June 18, 2012

BERNINA UPGRADE

In 1989, my mother offered to buy me a sewing machine, as she had done for my older sisters. We went to the sewing machine dealer and she gave me two options: 1) I could have a new Brand X machine (I honestly don't remember the brand) or 2) I could have a 1969 Bernina model 731.  The 731 was very similar to the model 530 my mom has had since she got married; the machine on which she taught me to sew. I don't remember pausing at all before telling her I wanted the Bernina. She paid $275 for it, which was a hefty sum for her back then, but it seems like a bargain to me now.


I've sewed on that machine ever since. I've used it to make skirts and dresses, curtains and pillows, quilts and quilt tops, and even a few improvised chair covers. It's a great machine, built like a tank and still going strong. But, it doesn't do many stitches and I'd starting getting a little envious of my friends' newer and more amply equipped machines. The question was, would I buy a different brand that might get me more features for less money, or would I spring for a newer Bernina that would probably cost more, but would likely last forever, just like my old machine? A dilemma.

So, when I heard that The City Quilter was upgrading its classroom machines to new 550QE models, and they'd be selling the old 440QEs, it got me thinking. They were having the machines completely refurbished and they would come with a new-machine warranty. Still, a Bernina is rarely cheap, and I while I considered the price fair, it was still a hefty sum.

After discussions with my husband (who is surprisingly supportive of my quilting habit) and my sister (who is always surprisingly wise for one so youthful), I decided that getting one of the used machines would be a good investment. Given how much I've been sewing in the past few years, I can only presume that the new machine will make that sewing easier and more enjoyable.

I stopped by the shop one day to pick up some thread and mentioned that I'd decided that I wanted one of the machines.  About a week earlier, they'd told me that the machines were out being serviced, so I was taken by surprise when they said they had one ready to send home with me.

Huh?!

Sure, I'd decided that I was going to get one, but hadn't planned on getting one that day. But, no sense in procrastinating, so I bought the machine, hailed a cab, and headed home. My husband was out of town, so I photographed the friend in the cab and texted it to him.

He was not entirely surprised.

So, my new machine is home now and I'm not disappointed. It's a little quieter than the 731, which means I can better hear my NPR shows as I sew, and I appreciate the highly specific stitch length options...not to mention the many stitches available!


Included in the purchase price was a three-hour "get to know your machine" guide class. Among other things, we learned how to use the needle threader (I'm still doing it the old-fashioned way), the walking foot, the Bernina Stitch Regulator, and (perhaps my favorite) the programmable memory.

I still need some practice with my free motion quilting...


...and I have to figure out a way to get the apostrophe to show up better...


...but I did make my first ever buttonholes. (I've always either opted for a zipper or had my mom make buttonholes for me.)

I also have to get used to the knee-operated free hand system for lifting the presser foot. I'm told it saves a lot of time. My problem is that the "gas pedal" for my mom's old Bernina is a knee control lever, instead of a foot control. (See item 19 below.)

Even though I haven't used her machine for many years, my muscle memory wants to use anything by my knee to control the speed of my sewing. It's going to take a while to retrain myself.

I have plenty to learn about all the ins and outs of the machine, but I'm very pleased with my purchase and look forward to years of happy quilting together.

Sunday, June 10, 2012

LETTING GO...AND HOPING FOR THE BEST

So, I finished the lap quilt I was making for our friend who was moving to Pasadena and have been waiting to give it to her before posting the final product (read more about the quilt here and here). I'm really happy with the way the colors work together in a relatively simple pattern (Lake Shore Drive from Colorful Quilts for Fabric Lovers by Amy Walsh and Janine Burke). And the purple Kaffe Fassett Wood Ear on the back may be my new favorite fabric. It's so vibrant and friendly. Love it!

Betty's Purple Passion
Back of quilt
We took Betty out to dinner a few days before she left and gave her the quilt that night so she'd have time to include it in her packing. She's not one for grand displays of emotion, but my husband (who knows her far better than I do) said he could tell she likes it.

Betty has now made the move west and is settling into her new apartment. We hear that she's using the quilt to add color to her bedroom and carries it with her from room to room to help stay warm in the air conditioned environment. (She's not used to central air at home.)

My goal was to give Betty something that would remind her of her New York friends, and to help make her new home more comfortable. The quilt seems to have succeeded on both counts. I couldn't be more pleased.

Monday, June 4, 2012

OM IS WHERE THE QUILT IS

At the April Metro Mod Quilting Guild meeting, we were reminded that the deadline for the Alliance for American Quilts "Home Is Where the Quilt Is" contest was June 1. I liked the idea of making a very small quilt (15" wide x 19" high) in the shape of a house and thought I'd give it a try. My first time entering a quilting contest!


Because we had so many quilts around when I was growing up, quilts have always felt like home to me--comforting and calming. A quilt is always a safe place to cozy up. I kept trying to think of a way to reflect that in a quilt, but kept coming up blank. Then, after a particularly trying day at work, I came home looking forward to doing some quilting to calm and distract me from the frustration at the office. Before starting, I took a few deep, cleansing breaths...and then it occurred to me: quilting calms me just like yoga does.  And that's when it hit me, "Om Is Where the Quilt Is." 

A sacred Sanskrit word, "om" is used at the beginning and end of a prayer or mantra, and is often intoned at the start and end of yoga classes. To me, it's an invitation at the beginning of class to refocus and calm myself, and a reminder at the end of class to take that focus with me.

I'd been working on a few log cabin blocks, so I decided to to put together a wonky log cabin house in various shades of blues (a calming color for me) with an om symbol in a shade reminiscent of henna.

I started the quilt in late April and was pleased with how quickly the base of the house (the rectangle) came together. The roof, my first log cabin triangle, was also pretty easy.

House base with roof positioned for sewing.
I'm not a big fan of applique, so I knew attaching the om symbol was going to be a challenge. I decided to use zigzag topstitching to save my sanity. Unfortunately, I'd never even done that before.  So instead of looking online for a tutorial or some tips, I presumed I could find my way. I went ahead and cut out the om and basted it to the quilt top. Then I started topstitching. As you can see below, it turned out horribly, with puckers aplenty. This was not a good plan.

How NOT to machine applique.

Discouraged, I put the quilt aside for a few weeks while I tried to figure out how to fix it (and to put off undoing all that topstitching!). I think I was reading a quilting magazine that mentioned fusible web and thought that might solve my problem. I also thought it might help with stability to quilt the house before attaching the om. So, I focused on quilting the house (I used straight and curvy lines radiating from the center), then I bought some fusible web (for lightweight fabrics), removed the old om, and cut out a new one.


Then, following the instructions on the package, I attached the fusible web to the om (so simple--just lay the fabric on the web and apply pressure), and trimmed the web to the size of the fabric.


I pulled the paper off the web...


...positioned it on the house, and pressed using a hot iron. That om wasn't going anywhere!

What a breeze it was to do the topstitching this time. No fighting fabric, and the results were exactly what I had in mind.

I broke out my trusty copy of Happy Endings by Mimi Dietrich (I find I always have to consult the binding bible when I get to that point) and made and attached the binding. I'm pleased with how it turned out, although this photo (taken as I was rushing to get it in the mail before the deadline) is not fabulous. Hopefully it will look better at the exhibit!
The houses will be part of a traveling exhibit through November, starting at the Original Sewing & Quilt Expo in Raleigh, North Carolina, then they'll be auctioned off to benefit the Alliance for American Quilts.
Here are a few other bloggers who have posted about their entries:


Saturday, May 19, 2012

70-YEAR-OLD QUILT PATTERNS

My husband and I were heading out to run some errands this afternoon and met the mailman coming in to deliver our mail. I was pleased to see that one of my quilt magazines was part of the delivery, as well as a large manila envelope with a return address in Pocatello, Idaho. It took a minute to register that it was from my cousin Raylene. (I'm not used to seeing her married name.)

I haven't seen Raylene since we were both teens, so I was eager to see what she'd sent. I opened the envelope to find a short note from Raylene that read:

"These belonged to Grandma Earl.  Enjoy!"


Inside were two very old pattern booklets and a few loose pages. What a lovely surprise, especially since they were my grandmother's. (My mother's mother, who made most of the quilts I grew up with and several of the ones I have in my home.) Raylene and her family don't quilt, so it was very generous of her to send the booklets to me.

Grandmother's Patchwork Quilts includes a number of traditional quilt patterns. 


I'm usually not a huge fan of floral patterns, but this stylized flower is intriguing.  I love all the different shapes in the pattern and how they could be manipulated through the use of color.


Heirloom Quilts was published in 1941 and sold for a whopping 10 cents!


The page on crazy quilts includes a couple of blocks that have a strikingly modern look -- like the Crazy Patch Quilt and the oblongs.


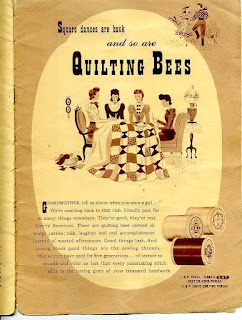
I found the thread ad in the back of the booklet particularly amusing. Who knew that quilting bees replaced bridge parties in the '40s? ("...real accomplishment instead of wasted afternoons.")

I'm pleased to be able to add these to my quilting library, and my thanks to my cousin for sending them along!

(P.S. If you're making a quilt on the fly without a pattern, it might be a good idea to make a basic drawing and write down all the measurements so you don't cut everything and then realize you forgot to take something into account. Sure, you might be able to figure out a way to salvage it, but wouldn't it be less frustrating not to have to? I'm just saying.)

Monday, May 14, 2012

A VISION IN QUILTING (MAGAZINES)

A few weeks ago, I had my eyes checked and learned (no surprise) that I needed a stronger prescription for my left eye. I ordered new lenses for my glasses last week and stopped by the optical shop this afternoon to get them put into my frames. They said it would take about 90 minutes, so I had time to kill on 7th Avenue, one of Park Slope's well-traveled shopping districts.

My first stop was Clay Pot, an eclectic shop where we've found clever mugs, cute earrings, and stylish serving ware, not to mention my engagement and wedding rings. Today, some blown glass chickens caught my eye. (Have I mentioned my bordering-on-obsession fixation on chickens?) I didn't buy any, but I did send a photo to my husband (hint, hint).


Photo: Jon 'ShakataGaNai' Davis
Next, I headed to Barnes & Noble, where I fully intended to look at their Nook e-reader. I have a first generation Kindle (see ancient-looking device to the left), which is fine, but I'm constantly frustrated by 1) not being able see what page I'm on relative to the number of pages in the book, and 2) not being able to see how many pages are left to the end of a chapter.

Recent ads for the Nook show page numbers at the bottom of the screen, something like "page 47 of 384." I'm not excited about paying for a new e-reader, but it would be worth it to be able to know how may pages are left. Now, I do realize that if you change the font on the Kindle (my husband and I use very different sizes), it changes the number of pages in a book, but isn't this the sort of simple math that should be a breeze for an electronic device?

Anyway, I went into B&N to look at the features on the Nook. I got distracted by the magazine section and thought I'd see if there were any new quilting magazines. Well, of course there were, including a few I'd never seen before.


Modern Quilting is from the UK and has some cute patterns in fabulously bright colors. I'm looking forward to poking around their website to see what other lovely things they have to offer.

Quilt Mania is printed in France, but thankfully this was the English edition. My high school French isn't good enough for me to understand quilting instructions. It has some interesting articles about the 11th International Tokyo Great Quilt Festival and the Reiko Kato Exhibit (also in Tokyo), but my favorite thing in the magazine is the pattern for "Bird on a Wire," the quilt featured on the cover.

Quilt Mania Magazine
Quilty is a new magazine from Fons & Porter. (This is the first issue.) It's subtitle is "fresh patchwork + modern quilts" and it isn't false advertising. I guess Quilty is also an online quilting show, but I have yet to check it out. The magazine has some nice patterns, tips and techniques, and some basics for beginners. There's even an article about the Modern Quilt Guild, including a photo of a quilt by Elizabeth Hartman from Oh, Fransson, currently one of my favorite quilt book authors. (I'm eagerly awaiting the delivery of my copy of Modern Patchwork, a birthday gift from my husband.)

Quilty Magazine
While some of the patterns in Quilt are more traditional than in the modern-focused magazines I found, several of them got me thinking about new projects. Even an old tried-and-true pattern can be made to look new with creative fabric and color choices.

Okay, Threads isn't a quilting magazine, but it has an interesting article on how to make removable covers for dress forms, so that one form can be modified to work for any size you make. (No, I don't have a dress form yet, but someday I will and then this article will come in so very handy!)

After I'd bought all the magazines and headed in the direction of the small craft/quilt store at 7th and Union, I realized that I'd completely forgotten to look at the Nook. (sigh)

Fiber Notion is a cozy little shop located at one of the busier intersections on 7th Avenue, not far from the infamous Park Slope Coop. Because of the shop's limited size, their selection is naturally not what you'd find in a larger store, but there's a nice selection of fat quarters and yardage of some vibrant fabrics. They're not just a quilt shop, so there are also other craft supplies, as well as books and notions. With a new project in mind, I picked up some fusible web and a handful of fat quarters. (Note: They are a bag-free store, so if you check them out, be sure to bring your own bag to carry home your purchases.)

By the time I left Fiber Notion, my glasses were ready and I stopped back to pick them up. Aaaah! Now I can see to read all of my new magazines!

Sunday, April 29, 2012

A PLACE FOR EVERYTHING

Oh, the joy, and the pain, of organizing my new quilting station.  I spent a good four hours or so on Saturday refolding just about every piece of quilting fabric I own so that a folded edge will show when placed on a shelf.


It was a lot of work, but well worth it. Now I can see all of my fabric at a glance, and the folded edges showing makes it easy to see what I have.  (And I'm please to see that while I have more fabric than I have projects, I have less fabric in total than I thought.)


Once everything was organized, I was ready to get back to work on the quilt-as-you-go quilt for our friend who's moving to Pasadena. Since I finished the pieced strips and pieced together the backs for the solid strips earlier in the week, I was ready to start quilting the solid strips with the backs. 


I decided to do three vertical lines spaced evenly across the strip, as well as some random curves. I marked the straight lines with a hera marker, which I find quite a handy tool. 


Once the strips were quilted, it was time to assemble the full quilt. I laid out the three solid strips and four pieced strips on that table of my quilting station. Sure, it's a little smaller than I'd like, but one makes do with what one has. Even a bit cramped, I thought it showed promise.


I decided to sew the strips with a basic seam, so that the front would be clean. It went pretty quickly, seeing as it's just a series of long, straight seams.


Here is the finished front...


...and the finished back. (I'll cover the raw edges of the seams on the back with strips in the same floral fabric as the long front panels.)


I'll have to piece some of the strips, because I have limited fabric left, but I think it will look good. Luckily, I have just enough to do all six strips.


I still have to decide what to do for the binding, but that will have to wait for another day. I had to get up early on Sunday morning, so I covered my sewing machine, bid good night to my wonderful quilting station and headed up to bed.


Friday, April 27, 2012

SHOW ME QUILTING STATION!

I checked in with my husband as I walked to the train after work today, just asking what he was making for dinner, if I needed to pick up anything on the way home, that sort of thing. I commented that the lovely spring evening had me feeling like I wanted to stop at City Quilter, although I was just there yesterday to pick up more batting and a larger rotary cutter (and maybe I also got a couple of long quarters), but what I really needed to do was a new post for my blog. He replied that he thought I'd have some organizing to do. 


Huh? We'd gotten a box of goodies from a friend in Greece this morning...


...but nothing that would involve organization, so I was baffled. "What do you mean?" I asked, to which he replied that he had set up something in my sewing area. Woo-hoo! My quilting station was done!


Last year for my birthday, my husband (an experienced woodworker) offered to build me a work table/storage cabinet for my sewing area. We're lucky to have a basement in our New York apartment, but our space is still limited. As I acquired quilting tools (and a little bit of fabric), I found I was having trouble finding adequate storage, not to mention I was forgetting what I already had. (Yes, I've bought the same fat quarter twice.) It's been a little longer in construction than he'd anticipated, but my fabulous quilting station is finally finished!


(Insert sound of angelic choir here...Ahhhhh!!)


The table is the same size as my cutting mat and is at a comfortable height for me to stand and cut or assemble quilts. There are deep shelves from top to bottom (I'll need to get some storage baskets) and, because space is at a premium, the table folds up to make a "door" for the top four shelves. Clever design by that man of mine. I'll be able to store my fabrics up top and things that won't suffer from a little dust (e.g., my sewing machine case) down below. It will also free up space on my sewing desk (just to the right of the station) for books, jelly rolls, tools, and the like.


When I got home, I spent a little time transferring my fabrics from various locations (including my desk, which no longer has room for my computer because of all the quilting supplies). I took a break for dinner (sliders and homemade potato chips--have I mentioned how wonderful my husband is to build things AND cook for me?) and now I'm blogging, as planned, but not about the quilt show we saw last week. That will wait for another day.


Tomorrow I'll have to choose between organizing my quilting station and working on one (or more) of my quilts. This is a dilemma I can work with.